Insurance claims live or die on documentation, and with auto glass, the camera on your phone is often the difference between a seamless repair and a frustrating delay. In Columbia, insurers, third-party administrators, and local shops are generally reasonable, but they all have standards. The right photos show cause, extent, location, and vehicle identity. The wrong photos make adjusters guess, and adjusters don’t guess. I’ve walked more than a few customers through approvals that took an afternoon instead of a week simply because we captured clean, comprehensive images before the first phone call.
This guide walks you through exactly what to photograph for insurance auto glass repair in Columbia, what angles and lighting avoid disputes, and where the requirements change depending on whether you need windshield chip repair, car window replacement, rear windshield replacement, or full windshield replacement Columbia insurers will authorize. I’ll weave in realities from the field, including how mobile auto glass repair Columbia providers handle on-site documentation, why windshield calibration Columbia procedures sometimes add photo expectations, and how to avoid common traps that stall same day auto glass Columbia appointments.
Why photos matter more than people think
Every carrier wants to confirm four things: what happened, what’s broken, where the damage sits, and whose car it is. When photos answer these in one pass, approvals come quickly, out-of-pocket extras get minimized, and the shop gets the green light to order glass. Miss any of those, and you’ll likely face a follow-up request that means at least a day’s delay.
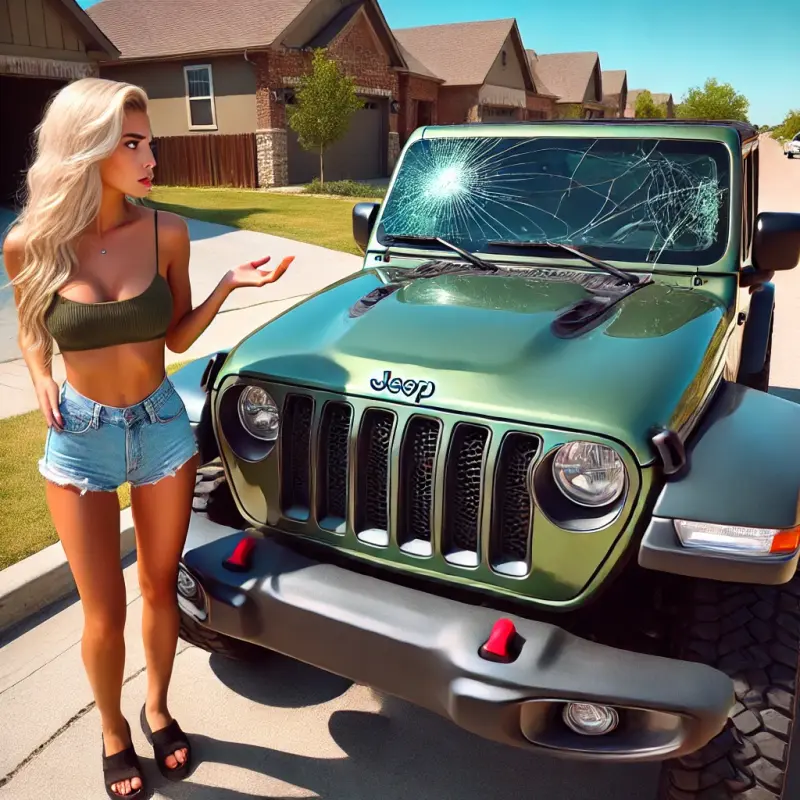
Adjusters don’t simply look for a crack. They look for crack origin, length relative to policy thresholds, visibility issues in the driver’s field of view, paint or body damage that hints at collision instead of road debris, and whether the ADAS camera or sensors will require calibration. Columbia drivers are often on I-26 or I-77, so debris strikes are common, but insurers still want proof. Good photos settle that immediately.
The essential photo set that works for most claims
Think of your photo set as a concise mini-report. We want identity, scene, detail, scope, and context. If you’re standing in your driveway at noon, you can capture everything in three minutes. If it’s raining or dark, I’ll show you how to adapt, but the sequence stays the same.
- VIN and license plate: capture both clearly, straight on, with no glare. The plate ties the car to your policy, and the VIN removes doubt when ordering glass. Wide exterior: front three-quarter and rear three-quarter shots in daylight if possible, so adjusters see the whole vehicle and relative cleanliness of panels around the damaged area. Damage overview: a medium shot showing the entire glass pane where the damage lives, with a recognizable landmark on the car for scale, like the A-pillar or rear wiper. Close-ups: crisp, in-focus photos of the impact point or crack origin, then the longest section of the crack with a ruler or credit card edge in frame for scale. Interior perspective: from the driver’s seat, show how the damage sits in the field of view, and if the vehicle has an ADAS camera at the top of the windshield, include a close shot of that housing.
That set answers nearly every question a carrier will ask on a first review. Most Columbia shops that handle insurance auto glass repair Columbia submissions will take variations of these images before they touch the car. If you supply them upfront, you’ll often skip an extra verification step.
Windshield chip repair vs full windshield replacement in Columbia
Not all glass damage is treated equally. Carriers often prefer windshield chip repair if the chip is small and outside the critical viewing area. If a chip is fixable, you’ll save time and avoid the cost and downtime of a replacement. But the line between repairable and replaceable hinges on details your photos must show.
For windshield chip repair Columbia approvals, adjusters want proof of size and location. A bull’s-eye smaller than a quarter or a crack under roughly six inches can often be repaired, provided it sits outside the wiper sweep and not directly in the driver’s core field of view. If your close-up includes a coin or a tape measure and a second photo shows where the chip sits relative to the steering wheel’s center line, you’ve made the adjuster’s job easy. Capture the chip from two angles to avoid glare hiding the radial legs. If the chip has begun to spread, a photo that follows the crack from start to finish prevents a reclassification dispute later.
For windshield replacement Columbia carriers want to see why repair won’t rear windshield replacement Columbia SC suffice. Longer cracks, edge cracks that meet the windshield frame, multiple chips, or damage inside the wiper sweep often trigger replacement. Photograph the crack origin, where it meets the edge if it does, and its total run with a measuring device. If you can safely do it, take a photo with the wipers lifted to show how the damage intersects the sweep path. A second wide shot from outside the car confirms whether tint strips or rain sensors might complicate the job.
Rear and side glass: different rules, same discipline
Side windows and rear glass rarely get repaired; they get replaced. A tempered side window that shattered into beads simply cannot be restored. For car window replacement Columbia requests, show the door with the glass missing or fragmented, the interior door panel to confirm glass debris, and the weather stripping. If you see scratching or denting on the frame, capture it. It helps the adjuster split glass damage from body work, which affects which part of your policy responds.
Rear windshield replacement Columbia claims benefit from photos that show heater grid lines, the wiper mount, and any defroster connectors. These elements matter when ordering the correct part number. A good set of photos includes an exterior wide shot of the back glass, a medium shot of the wiper arm area, and a close-up of the defroster tabs. If the glass is shattered, take interior photos of the parcel shelf and trunk floor to show glass spread. Adjusters want to ensure there was a single event rather than prolonged neglect or tampering. You’re not building a courtroom case, but accuracy shortens questions.
What Columbia insurers expect around ADAS and calibration
Modern windshields are not simple panes. Many vehicles on the roads in Columbia have forward-facing cameras for lane-keep assist, automatic emergency braking, or adaptive cruise. When the windshield is replaced, those cameras must be calibrated. Windshield calibration Columbia requirements vary by brand and model, but insurers want to know early whether calibration is required. Your photos should show the camera housing from the inside, the sensor layout at the top center of the glass, and any rain or light sensors at the base of the mirror mount.
Anecdotally, the difference between instant approval and a two-day pause often comes down to whether the initial photo set proves calibration is necessary. A clear close-up with the camera housing, the trim removed if the shop does it, and the sticker that lists ADAS specifications helps the shop quote correctly and the insurer approve the extra procedure. If your vehicle is a Honda, Toyota, Subaru, or newer Ford, assume calibration and document accordingly.
Light, angle, and clarity: field-tested tips that prevent denials
I have seen more claims delayed by reflections than by missing photos. A windshield is a mirror outdoors at noon, especially in Columbia’s summer sun. To beat glare, step to a 30 to 45 degree angle and tilt your phone slightly downward. Avoid shooting straight on unless a cloud cover softens reflections. If the sun is behind you, your body will cast a shadow that helps the camera catch the crack’s texture. For chips, tap to focus on the impact point and lock exposure if your phone allows it. Move slowly, breathe out, and shoot. Blurry images invite follow-ups.
If you only have time at night, stand under even lighting, like a garage or gas station canopy. Use your phone’s flash for close-ups, but take a second photo without flash to avoid washing out fine cracks. For long cracks, run a finger or a non-marking pointer along the path while a second person shoots from a slight angle. Don’t press on the glass; you’re guiding the viewer’s eye, not testing the structure.
Wet glass hides damage. If you can, wipe with a microfiber towel, then shoot immediately. Do not scrape ice off a cracked windshield to photograph it. Photograph the frost, then run the defroster for a minute so the center section clears and shoot the crack through the clear patch. Adjusters in Columbia see winter artifacts often enough to understand.
When mobile service handles the photos for you
Mobile auto glass repair Columbia technicians deal with insurance documentation daily. If your schedule is tight, let the tech collect the full photo set when they arrive. A well-run mobile operation will photograph VIN, plate, damage overview, close-ups, ADAS housing, and then upload everything to the claim portal. If your claim is not yet open, the shop can usually initiate it with your policy details while on site, then pin approval to the photos they just captured.
The advantage of mobile is speed and convenience, especially for same day auto glass Columbia availability. The caveat is parts logistics. Many windshields with ADAS cameras require exact match glass with camera brackets and sensor pads. If the tech arrives with generic stock, the job may be delayed. A solid set of your own pre-visit photos allows the shop to pull the correct part before dispatching the van.
Matching photos to specific damage types
Windshield chip with star legs: include a coin for size, rotate the camera to catch the star legs from two angles so none disappear into glare, and take an interior photo from behind the chip, which sometimes shows the break more clearly.
Long edge crack: start with a photo of the crack origin, then step along in two or three overlapping photos that follow its length to the edge. Finish with a wide shot that shows how close it runs to the driver’s side.
Rear windshield spidering: shoot outside, then inside from the rear seat, showing how far the spider legs spread across defroster lines. A close-up of the defroster tabs helps confirm the part and whether any tabs are torn off the glass.
Side window shattered: photograph the door from outside, then the interior seat and floor covered in beads of glass. If the window frame is bent, include that. If a theft is suspected, photograph the lock cylinder and door jamb. That can change which coverage applies.
Quarter glass damage: these panels differ by trim line. Take a close shot of any tint or embedded antenna lines, and a medium shot that includes the pillar and roofline. It saves a round of fitment questions.
Submitting photos: what each party needs
If you call your insurer first, they’ll either direct you to a claims portal or hand you off to a third-party glass network. Upload photos in the order we outlined: VIN, plate, exterior wide, medium with damage, close-ups with scale, interior field of view, ADAS housing if relevant. Name the files if the portal allows it. If not, group them and describe the sequence in the claim notes.
If you call a shop first, the best auto glass shop in Columbia will collect the photos and attach them to a work order that syncs with the insurer’s system. For recurring carriers in our area, adjusters often recognize the shop’s submission format and approve faster because they know the shop’s documentation standards. That’s not favoritism; it’s trust built by consistently complete files.
Edge cases that create headaches, and how photos resolve them
Existing damage plus new damage: sometimes a small chip sits near a fresh crack from a later impact. Photograph the chip and crack separately, then photograph both in one frame to show relative positions. The date stamps on photos and your narrative in the claim help the adjuster allocate the cause correctly.
Aftermarket tint bands: some windshields have a tinted top strip applied after purchase. Photograph the tint edge and any bubbles or edges near the crack. The shop needs to know whether to transfer or replace tint, and the insurer needs to know what is OEM vs aftermarket.
Sensors adhered to glass: rain sensors and auto-dimming housings often bond to the glass with gel pads. Photograph them close-up so the shop can order new pads and the insurer can see why material charges appear on the invoice.
Fleet or commercial vehicles: if you drive a company vehicle with fleet management, shoot the unit number placard and the VIN together. Fleet administrators in Columbia can be sticklers for cross-reference. Clean photos prevent back-and-forth emails.
Exotic or luxury models: on vehicles like Mercedes S-Class, Range Rover, or Teslas, options determine the correct windshield. Photograph the entire top edge from inside, the mirror mounting, any camera clusters, and the dash top. The right photos can prevent a return trip and a second removal, which no one wants on high-trim interiors.
Coordination with calibration: how photos shorten the road to green light
Calibration needs a documented trail: proof of ADAS equipment, proof of windshield replacement, then proof of calibration completion. On the front end, your photos of the camera housing and any radar sensor behind the emblem tell the insurer to approve calibration time. On the back end, the shop will photograph the diagnostic tablet screen showing calibration status and store it with your repair record. If the carrier requests it, those images close the loop on the claim.
Static calibrations usually happen in-shop with targets and measured distances. Dynamic calibrations happen on the road within defined speeds over marked lanes. In Columbia, dynamic routes on US-1 or Clemson Road work well since they offer clean lane markings. If you receive mobile service followed by an in-shop calibration, expect the shop to take another short photo set: your car in the calibration bay, the target setup, and a final dashboard image with no ADAS warning lights. Don’t be surprised if an adjuster asks for them.
What to expect when timing matters
Same day auto glass Columbia service is common for in-stock windshields and simple chips. What slows things down is uncertainty. Clear, complete photos reduce uncertainty. If you call by 9 a.m. with a full photo set and the glass is on the shelf, an afternoon replacement is realistic. If your vehicle needs rain sensor pads, trim clips, or a specialized molding, a shop may still fit you in by evening if they can source parts locally.
When weather interferes, most mobile teams carry pop-up canopies large enough to keep the workspace dry. Your photos in the rain may not satisfy an adjuster’s view of the crack, so plan a follow-up set after the glass is wiped inside a garage or under the canopy. Tell the shop you’ve done a first pass and will add a clear set upon arrival. That heads off requests later.
A brief checklist you can save
- Vehicle identity: VIN, license plate, and odometer if requested. Damage overview: wide exterior showing the whole pane, then medium with visible damage. Detail and scale: close-ups of the chip or crack origin with a ruler or coin, then the full crack length. Interior context: driver’s view of the damage, wiper sweep area, and any obstruction to vision. ADAS and attachments: camera housing, rain/light sensors, defroster tabs, antenna lines.
Choosing a shop that knows how to document
Documentation is half the craft. The best auto glass shop in Columbia will treat your photos as a baseline and add their own, then carry that thoroughness through every step: correct part selection, proper primers and adhesives, pinch-weld prep, and torque specs on trim. They’ll bake in the timing needed for adhesive cure based on temperature and humidity, not just a generic two-hour block. They’ll verify lane camera views before releasing the car and will show you the calibration pass screen, not merely say it’s done.
Ask how the shop handles insurance auto glass repair Columbia submissions. If the person on the phone explains the photo set in practical terms and offers to text you a simple guide, you’re in good hands. If they wave off the need for photos entirely, expect delays later when the carrier asks what they should have gathered on day one.
Final thoughts from the service bay
Good photos do not have to be art. They have to be honest, legible, and complete. Stand back, then step in. Give scale to what you see. Think like an adjuster for 60 seconds: prove what broke, where, and why replacement or repair makes sense. Whether your week calls for a quick windshield chip repair, a full windshield replacement, or a rear windshield replacement, those images are your ticket to speed.
In Columbia, where workdays run on tight schedules, mobile auto glass repair Columbia providers can bring the fix to your driveway or lot. Help them succeed by sending that five-part photo set before they roll. If calibration is on the table, include the ADAS housing. Do this, and the claim that might have stretched into next week usually resolves today. That is how you turn an inconvenience into a handled detail, with your car back to quiet, clear, and safe, and your insurer satisfied that the job was done right.